ESP32: a cheap and powerful MCU
A system introduction of this industrial-grade microcontroller
IOT
3/7/20233 min read

What is the ESP32?
The ESP32 is a Wi-Fi and Bluetooth combo chip operating at 2.4 GHz, built using TSMC's advanced 40 nm low-power technology. This microcontroller delivers exceptional power and RF performance, demonstrating remarkable robustness, versatility, and reliability across a broad range of applications and power scenarios. There are several ESP32 versions available in the market, equipped with both CISC and RISC architecture (ESP32-C3 only). The CISC SoC (System on Chip) come with an Xtensa LX7 CPU either one or dual-core, with a frequency of up to 240 MHz. The ESP32 microcontroller features 448 KB of ROM for booting and core functions, 520 KB of SRAM for data and instructions, and an additional 16 KB of SRAM in RTC. It also supports up to 8 MB of flash memory. As already said, it fully supports WIFI b/g/n (2.4 GHz only, both softAP and station mode), Bluetooth v4.2 as well as Bluetooth Low Energy (BLE). It also has tens of I/O pins for ADC/DCA, UART and SPI. It works with an operating voltage between 3V and 3.6V.
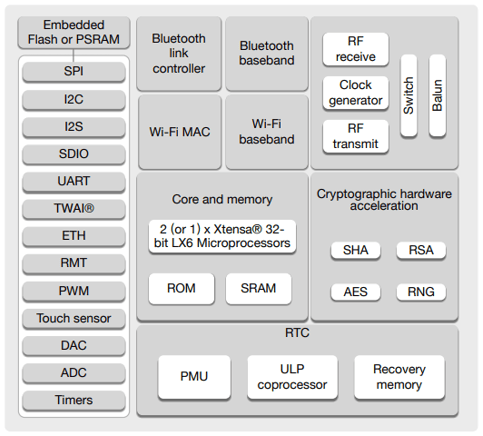
Not too bad, for an MCU that you can find at around 10/15$ online. The development boards (which add more components on top of the SoC and hence can be more expensive). Following a system block view:
Electrical Characteristics
Following the recommended operating conditions:

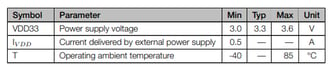
While the ESP32's minimum operating voltage is 3V, it is highly recommended to use a stable voltage of 3.3V for optimal performance. Additionally, when using Wi-Fi, it is crucial to ensure that the power supply can provide a stable current of up to ~ 400 mA (without voltage drop) to prevent the risk of frequent reboots.
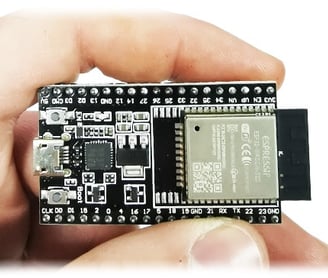
It is important to understand that you can either buy the SoC or a development board. The SoC contains the components that you can see in the block diagram above and it is basically this:
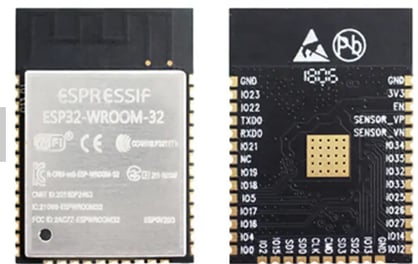
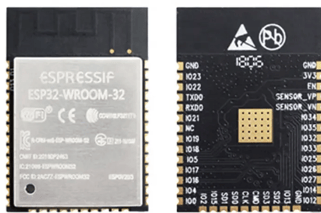
If you buy the above, you have to provide it with the right voltage and you have to program it (flash the firmware) yourself through UART. If you want to provide power through a USB port (5V), you would need a tensor regulator to bring it down to 3.3V, something like this:

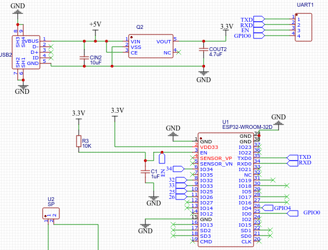
I'll write more about this in a different article.
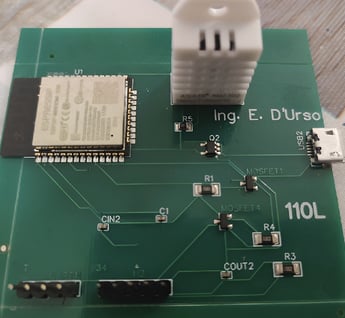
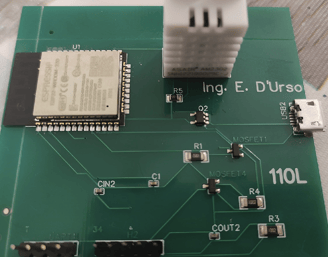
Development boards, include additional components such as voltage regulators, programming interfaces, and USB ports, making them easier to use for prototyping and development purposes. Unlike barebones microcontrollers, which may require additional components to be added to a circuit to regulate voltage or to facilitate programming, development boards are designed to be ready to use right out of the box. Shown below is a development board that I designed and printed as a PCB.
Wrapping up
In this article, I provided an introduction to the ESP32 microcontroller, covering its main features, capabilities, and electrical requirements. Taking an engineering approach, we started from the ground up and focused on the physical layer first, building a strong foundation of knowledge on the fundamental aspects of this microcontroller. This article was not intended to be a typical 'getting started' guide, but rather a foundational overview of the ESP32 for those who are new to this technology. In future articles, I will delve deeper into the ESP32, exploring advanced topics and providing step-by-step tutorials to help you get the most out of this powerful microcontroller. By following along with these articles, you will gain the skills and knowledge you need to confidently design and implement your own ESP32-based projects
e.durso@ed7.engineering
Headquartered in Milan, Italy, with a strong presence in London and the ability to travel globally, I offer engineering services for clients around the world. Whether working remotely or on-site, my focus is on delivering exceptional results and exceeding expectations.