Train a person detection model to run on a microcontroller (part 3)
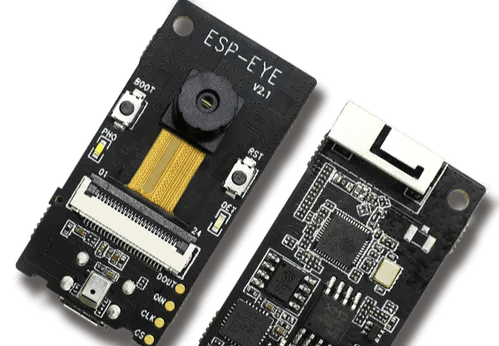
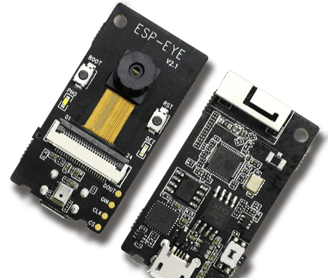
Deploy the model to an ESP32-eye
MACHINE LEARNINGIOT
3/23/20237 min read
Introduction
In the previous two parts, we discussed the important steps of data collection and training a TFLITE model for person detection. In this article, we will explore the process of deploying the TFLITE model onto an ESP32 microcontroller. The ESP32 is a powerful microcontroller that is capable of running deep learning models at the edge. By deploying the person detection TFLITE model onto the ESP32, we can create a system that can detect the presence of a person in real time. This can be useful in various applications such as security systems, home automation, and robotics. Throughout this article, we will cover the steps involved in deploying the person detection TFLITE model onto the ESP32, including converting the TFLITE model to a format that can be used by the ESP32, configuring the ESP32, and testing the system. By the end of this article, you will have a clear understanding of how to deploy a TFLITE model onto the ESP32 and create your own person detection system.
ESP-IDF
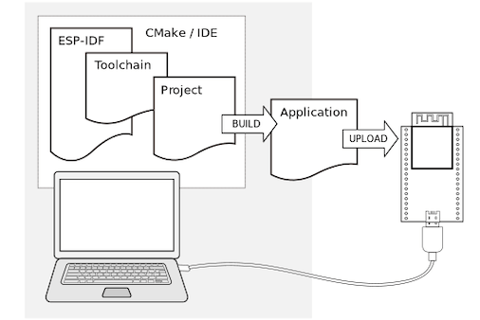
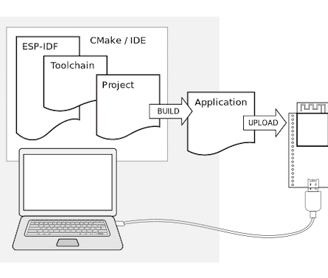
Let's take a moment to talk about the development environment we will be using for deploying the TFLITE model on the ESP32, the ESP-IDF. The ESP-IDF is the official development framework for the ESP32 microcontroller, providing a set of libraries and tools that simplify application development, including support for FreeRTOS, TCP/IP, and Bluetooth. Compared to the Arduino IDE, a popular development environment for the ESP32, the ESP-IDF offers several advantages. First and foremost, the ESP-IDF offers a more robust and powerful set of tools for developing ESP32 applications. The Arduino IDE, while user-friendly, has limited functionality and is not suitable for more complex projects. In addition, the ESP-IDF provides access to advanced features of the ESP32, such as low-power modes and hardware acceleration. These features can be leveraged to create more efficient and powerful applications. Moreover, the ESP-IDF is better suited for larger projects that require more organization and structure. It provides tools for building and managing complex projects, including libraries and modules that can be easily integrated into your code. Using the Arduino IDE for deploying the TFLITE model on the ESP32 can result in flashing unnecessary firmware and libraries, which can use up valuable memory and potentially cause errors. By using the ESP-IDF, we can streamline the deployment process and only flash the necessary firmware and libraries. Overall, while the Arduino IDE may be suitable for beginners and simple projects, the ESP-IDF offers a more powerful and flexible development environment that is better suited for larger and more complex projects on the ESP32. Here the official documentation about it, with precise instructions to download and install it.
IDE and programming language
When it comes to programming the ESP32, the IDE of your choice is largely a matter of personal preference. Some popular options include Visual Studio, Eclipse, and CLion, all of which have support for the ESP-IDF. As for the programming language, the ESP32 supports C and C++, with some debate surrounding the use of C++ in embedded systems. While C++ offers many powerful features, some argue that its use can lead to larger code sizes and decreased performance in memory-constrained embedded systems like the ESP32. However, with careful coding practices and judicious use of C++ features, it is possible to create efficient and effective code for the ESP32 in either language.
From Python to C
In the previous article, after training and quantization the last executed command was:
The command generates a C file named esp32_model.cc that contains a char array representation of the binary data. It looks like something like:
The content looks cryptic (and it is) but that will be read by TFlite micro as we will see shortly. At the end of the file, there is one more variable defined:
unsigned const int person_detection_quantized_tflite_len = 314184;
This is the array size in bytes, which is roughly 306 Kb. There is an important change to be done to the array definition, namely, it must be a constant value, modifying the definition to something like:
const unsigned char person_detection_quantized_tflite[]
The use of a const qualifier in the declaration of a variable makes an important difference in where the compiler will store the data associated with that variable. If a large variable is declared as const, the compiler will typically place it in read-only memory, such as flash memory on an embedded device. This can help to conserve scarce RAM resources on the device since read-only memory is typically larger than RAM. On the other hand, if the same variable is declared as non-const, the compiler will usually place it in RAM instead. Likely, without the above change, it will be not possible to flash the app into the microcontroller at all.
A brief note about RAM and SPI-RAM in the ESP32
ESP32 has a few hundred kilobytes of internal RAM, residing on the same die as the rest of the chip components. It can be insufficient for some purposes, so ESP32 has the ability to also use up to 4 MB of external SPI RAM memory. The external memory is incorporated in the memory map and, with certain restrictions, is usable in the same way as internal data RAM. It is easy to activate and use, read here for further details.
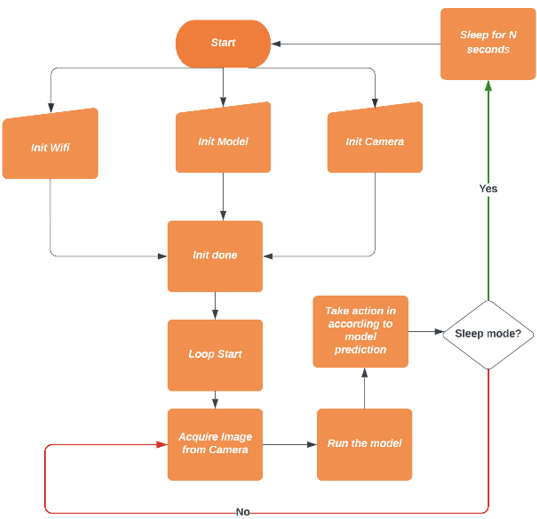
A typical application workflow
A common workflow for a person detection application typically involves the following steps:
Initialize the necessary components: This may include initializing the WiFi connection (if necessary), initializing the camera, and loading the model onto the device.
Enter a loop: The application then enters a loop where an image is captured from the camera and passed to the model for analysis.
Analyze the image: The model analyzes the image and makes a prediction about whether a person is present in the image or not.
Take action: Based on the model's prediction, the application takes appropriate action. For example, if a person is detected, the application may trigger an alarm, send an alert, or take some other action.
Repeat the loop: Depending on the application, the loop may immediately repeat, capturing another image and passing it to the model for analysis. Alternatively, the application may enter sleep mode to conserve energy until the next image needs to be captured.
This workflow can be visualized using a flow chart or similar diagram to help illustrate the sequence of events:
Some details about the code
Although I won't be providing a line-by-line analysis of the code in this article, I will be highlighting some key points that are especially noteworthy. By delving into these aspects in greater detail, we can gain a deeper understanding of the underlying mechanics and functionality of the code. The complete code is available here.
Tensor arena size and operation resolver
During the initialization of the TFlite Micro interpreter, two crucial arguments must be provided: a tensor_arena, which is a designated block of memory that the interpreter will use for internal operations, and a list of "OpResolvers". These two arguments are essential for the proper functioning of the TFlite Micro interpreter. The tensor_arena provides a dedicated space in memory for the interpreter to perform its computations, while the OpResolvers define how the interpreter should execute different types of operations. By passing these arguments correctly, the interpreter can be customized to suit the specific needs of the application and can run more efficiently and effectively. This is done as shown here:
Allocating the tensor arena for the TFLite Micro interpreter requires consideration of both the model size and the amount of memory needed for intermediate computations. In this example, SPIRAM is used to allocate the tensor arena, which helps to conserve RAM resources on the ESP32. However, determining the optimal size of the tensor arena may require some experimentation and tuning, as there is no formulaic way to compute it. Additionally, identifying the necessary operations for the model may also require some trial and error, as it depends on the specific layers and architecture of the model. By testing different combinations of operations and adjusting the tensor arena size as needed, the TFLite Micro interpreter can be optimized for the particular application and hardware environment.
Acquisition from Camera and model input size
The ESP EYE camera provides flexibility in capturing images of varying sizes and formats, from 96x96 to over 1000x1000, in JPEG, RGB, and grayscale formats (see app_camera_esp.h). It is important to ensure that the captured images are passed to the model in the appropriate format. In this example, we are working with a 256x256 grayscale image. Therefore, we acquire the image with a size of 240x176 and then resize it to 256x256 using neighbour interpolation, as implemented in the process_camera_image function in image_provider.cc. By using this resizing technique, we can ensure that the image is processed in the appropriate format by the model.
Actual prediction
This is the code that runs the actual prediction:
In this example, the output of the TFLite model is a float that represents the probability of a person being present in the image captured by the camera. It is important to note that the TFLite output has not been quantized. Quantization is a technique used to reduce the precision of the weights and activations in a neural network, typically from a 32-bit floating-point format to a lower precision fixed-point format, such as 8-bit integers. Quantization can help to reduce the memory footprint of the model and improve the inference speed, but may result in a loss of accuracy. If you would like to learn more about quantization, you may want to check out my previous article on the topic. Since the ESP32 microcontroller supports float operations, using a float output is a viable option.
Wrap up
In this article, we have explored the capabilities of TFLite Micro running on an ESP-EYE microcontroller. We have covered the tools needed to compile and build the application, and discussed some key considerations regarding image size and tensor arena. Additionally, I have provided some insight into the internal workings of memory management on the ESP32. I hope that this article has provided a useful starting point for engineers interested in deploying machine learning models on embedded devices. The full code for this project is available here.
e.durso@ed7.engineering
Headquartered in Milan, Italy, with a strong presence in London and the ability to travel globally, I offer engineering services for clients around the world. Whether working remotely or on-site, my focus is on delivering exceptional results and exceeding expectations.